
- Part 1 : Introduction
- Part 2 : Getting Started
- Part 3 : How to use Xamarin Forms with Visual Studio without the Business Edition
- Part 4 : Application Resources
- Part 5 : Dependency Injection
- Part 6 : View Model First Navigation
- Part 7 : Unit Testing
- Part 8 : Consuming a RESTful Web Service
- Part 9 : Working with Alerts and Dialogs
- Part 10 : Designing and Developing the User Interface
- Part 11 : Updating to Xamarin Forms 1.3
- Part 12 : Extending the User Interface
So far my app isn’t navigating anywhere as it only has one page showing a list of mountain areas. What I want is for the app to navigate to the forecast when you tap on a mountain area in the list. There are generally two approaches to navigation with MVVM, View First and View Model First.
As the names suggest with View first we create the View and then the View Model, and with View Model first we create the View Model and then the View. In both cases the BindingContext of the View needs to be set to the View Model. I will be taking a View Model first approach. There are very good reasons for this.
MVVM done correctly requires that the View Model does not know about the View, or any view for that matter. The application logic should be in your View Model and not in the View. The View is simply a visual representation. If we adhere to these basic principles then View first really does not fit well with MVVM. I have seen various workarounds such as navigating to a view via a key or even worse referencing the View from the View Model. Then there is the issue of passing state. The state, or more commonly the model needs to be passed to the view model. With View first this becomes a challenge. I have seen state packaged in to uri strings or bundled into messages. All this is nonsense because we don’t need to do this at all. Life becomes a whole lot simpler, as does your application, when we take a View Model first approach.
With View Model first View Models collaborate with and navigate to other View Models. Some developers seem to have some misconceptions about MVVM and think that View Models should not communicate with each other directly. This is nonesense. View Models should never directly communicate with Views, but it is completely natural for View Models to collaborate with other View Models. This is particularly true when you have a view model made up other view models or when a view model needs to navigate to another view model. This is a perfectly natural world and is a fundamental part of our application logic.
In WPF View Model first is made very easy for us with the help of Data Templates. View Model types can be mapped to their Views by defining a Data Template for a View Model Type. This works so well it’s almost magical. Unfortunately Xamarin Forms Data Templates cannot be associated with a Data Type therefore we have to find another way to resolve Views from View Models. This is actually quite easy to achieve using a simple dictionary mapping one type to another.
One other issue is the Xamarin Forms Navigation interface, INavigation.
public interface INavigation
{
    Task<Page> PopAsync();
    Task<Page> PopModalAsync();
    Task PopToRootAsync();
    Task PushAsync(Page page);
    Task PushModalAsync(Page page);
}
If we were to consume this interface from our view models we would be violating the MVVM pattern because we would be dealing directly with Page, which is the View. We definitely don’t want to do that. What we want is an interface that works with view models instead.
In this post I am going to show you how we can achieve View Model first Navigation in a simple and elegant way and extend my application to display weather forecasts for each mountain area.
So, let’s get started.
ViewModelBase
Firstly it’s about time I introduced INotifyPropertyChanged. Yes you guessed it; I need ViewModelBase. I am also going to create an interface to represent a view model named IViewModel rather than directly using INotifyPropertyChanged. BindableObject also implements INotifyPropertyChanged, which I definitely don’t want to be working with. This interface also introduces a Title property and a SetState method.
public interface IViewModel : INotifyPropertyChanged
{
    string Title { get; set; }

    void SetState<T>(Action<T> action) where T : class, IViewModel;
}
Title simply allows each view model to have a Title. The SetState method allows us to provide an action that will set the state of the view model when called. This allows us to reuse view models and set their state when navigating. This is an important consideration for mobile devices. ViewModelBase implements this along with some helper methods for calling PropertyChanged. I have placed these in my Core project in the ViewModels folder.
namespace Silkweb.Mobile.Core.ViewModels
{
    public abstract class ViewModelBase : IViewModel
    {
        public string Title { get; set; }

        public event PropertyChangedEventHandler PropertyChanged;

        public void SetState<T>(Action<T> action) where T : class, IViewModel
        {
            action(this as T);
        }

        protected virtual bool SetProperty<T>(ref T storage, T value, [CallerMemberName] string propertyName = null)
        {
            if (object.Equals(storage, value)) return false;

            storage = value;
            OnPropertyChanged(propertyName);

            return true;
        }

        protected void OnPropertyChanged([CallerMemberName] string propertyName = null)
        {
            var eventHandler = PropertyChanged;
            if (eventHandler != null)
            {
                eventHandler(this, new PropertyChangedEventArgs(propertyName));
            }
        }

        protected void OnPropertyChanged<T>(Expression<Func<T>> propertyExpression)
        {
            var propertyName = PropertySupport.ExtractPropertyName(propertyExpression);
            OnPropertyChanged(propertyName);
        }
    }
}
View Factory
As I mentioned earlier we need some way to map view models to view types. And we also need to be able to resolve the view from a given view model. Create an interface called IViewFactory in the Core project within a Factories folder. Add the following to the interface.
namespace Silkweb.Mobile.Core.Factories
{
    public interface IViewFactory
    {
        void Register<TViewModel, TView>()
            where TViewModel : class, IViewModel
            where TView : Page;

        Page Resolve<TViewModel>(Action<TViewModel> setStateAction = null)
            where TViewModel : class, IViewModel;

        Page Resolve<TViewModel>(out TViewModel viewModel, Action<TViewModel> setStateAction = null)
            where TViewModel : class, IViewModel;

        Page Resolve<TViewModel>(TViewModel viewModel)
            where TViewModel : class, IViewModel;
    }
}
The Register method allows us to register a view model with a view type. The Resolve methods allow us to resolve a view from either a view model instance or from a view model type. I have also provided an overload to return both the view and the view model instances. In the same folder add the following implementation.
namespace Silkweb.Mobile.Core.Factories
{
    public class ViewFactory : IViewFactory
    {
        private readonly IDictionary<Type, Type> _map = new Dictionary<Type, Type>();
        private readonly IComponentContext _componentContext;

        public ViewFactory(IComponentContext componentContext)
        {
            _componentContext = componentContext;
        }

        public void Register<TViewModel, TView>()
            where TViewModel : class, IViewModel
            where TView : Page
        {
            _map[typeof(TViewModel)] = typeof(TView);
        }

        public Page Resolve<TViewModel>(Action<TViewModel> setStateAction = null) where TViewModel : class, IViewModel
        {
            TViewModel viewModel;
            return Resolve<TViewModel>(out viewModel, setStateAction);
        }

        public Page Resolve<TViewModel>(out TViewModel viewModel, Action<TViewModel> setStateAction = null)
            where TViewModel : class, IViewModel
        {
            viewModel = _componentContext.Resolve<TViewModel>();

            var viewType = _map[typeof(TViewModel)];
            var view = _componentContext.Resolve(viewType) as Page;

            if (setStateAction != null)
                viewModel.SetState(setStateAction);

            view.BindingContext = viewModel;
            return view;
        }

        public Page Resolve<TViewModel>(TViewModel viewModel)
            where TViewModel : class, IViewModel
        {
            var viewType = _map[typeof(TViewModel)];
            var view = _componentContext.Resolve(viewType) as Page;
            view.BindingContext = viewModel;
            return view;
        }
    }
}
Here I am simply using a dictionary for mapping the types. Of particular note is the IComponentContext. This is an Autofac object that allows us to resolve types outside the normal dependency injection path. This is something that is not normally recommended, but in this case we have a factory class that needs to resolve any type of IViewModel and any type of Page. I could have created a Func<> parameter for this but it wouldn’t really have yielded much benefit and would have made things a bit more complex than they need to be. I may refactor this later, but for now it’s fine as it is. Also notice that I am calling SetState in the resolved view model if the setSetAction is set. This allows the view model’s state to be initialised or changed when resolved.
Navigator
Now we need a Navigation interface similar to Xamarin Forms INavigator except it needs to work with IViewModel. Add an INavigator interface under a Services folder in the Core project with the following definition.
namespace Silkweb.Mobile.Core.Services
{
    public interface INavigator
    {
        Task<IViewModel> PopAsync();

        Task<IViewModel> PopModalAsync();

        Task PopToRootAsync();

        Task<TViewModel> PushAsync<TViewModel>(Action<TViewModel> setStateAction = null)
            where TViewModel : class, IViewModel;

        Task<TViewModel> PushAsync<TViewModel>(TViewModel viewModel)
            where TViewModel : class, IViewModel;

        Task<TViewModel> PushModalAsync<TViewModel>(Action<TViewModel> setStateAction = null)
            where TViewModel : class, IViewModel;

        Task<TViewModel> PushModalAsync<TViewModel>(TViewModel viewModel)
            where TViewModel : class, IViewModel;
    }
}
Notice this exactly mirrors INavigation except Page is replaced with IViewModel. I have also provided an overload of PushAsync that expects the view model to be resolved automatically and sets the state of view model when it gets resolved. Now add the following Navigator class to the Core project services folder.
namespace Silkweb.Mobile.Core.Services
{
    public class Navigator : INavigator
    {
        private readonly Lazy<INavigation> _navigation;
        private readonly IViewFactory _viewFactory;

        public Navigator(Lazy<INavigation> navigation, IViewFactory viewFactory)
        {
            _navigation = navigation;
            _viewFactory = viewFactory;
        }

        private INavigation Navigation
        {
            get { return _navigation.Value; }
        }

        public async Task<IViewModel> PopAsync()
        {
            Page view = await Navigation.PopAsync();
            return view.BindingContext as IViewModel;
        }

        public async Task<IViewModel> PopModalAsync()
        {
            Page view = await Navigation.PopAsync();
            return view.BindingContext as IViewModel;
        }

        public async Task PopToRootAsync()
        {
            await Navigation.PopToRootAsync();
        }

        public async Task<TViewModel> PushAsync<TViewModel>(Action<TViewModel> setStateAction = null)
            where TViewModel : class, IViewModel
        {
            TViewModel viewModel;
            var view = _viewFactory.Resolve<TViewModel>(out viewModel, setStateAction);
            await Navigation.PushAsync(view);
            return viewModel;
        }

        public async Task<TViewModel> PushAsync<TViewModel>(TViewModel viewModel)
            where TViewModel : class, IViewModel
        {
            var view = _viewFactory.Resolve(viewModel);
            await Navigation.PushAsync(view);
            return viewModel;
        }

        public async Task<TViewModel> PushModalAsync<TViewModel>(Action<TViewModel> setStateAction = null)
            where TViewModel : class, IViewModel
        {
            TViewModel viewModel;
            var view = _viewFactory.Resolve<TViewModel>(out viewModel, setStateAction);
            await Navigation.PushModalAsync(view);
            return viewModel;
        }

        public async Task<TViewModel> PushModalAsync<TViewModel>(TViewModel viewModel)
            where TViewModel : class, IViewModel
        {
            var view = _viewFactory.Resolve(viewModel);
            await Navigation.PushModalAsync(view);
            return viewModel;
        }
    }
}
Here I am simply calling the View Factory to resolve the view and then calling the Xamarin Forms INavigation instance to navigate to the view. Note, the INavigation instance is passed to the constructor as Lazy. This is because it needs to be deferred until we have set the main page of the application to the navigation page.
Bootstrapper
Now we have our ViewFactory and Navigator we need to register them with Autofac. I want to be able to provide a core bootstrapper with all the core services and factories already registered and then just add the application specific registrations. To do this I need to refactor the existing bootstrapper and provide a core Autofac bootstrapper which I can inherit for my applications bootstrapper.
I will put all my registration in a separate Autofac Module. Create a folder in Core called Bootstrapping and add the following AutofacModule class.
namespace Silkweb.Mobile.Core.Bootstrapping
{
    public class AutofacModule : Module
    {
        protected override void Load(ContainerBuilder builder)
        {
            // service registration
            builder.RegisterType<ViewFactory>()
                .As<IViewFactory>()
                .SingleInstance();

            builder.RegisterType<Navigator>()
                .As<INavigator>()
                .SingleInstance();

            // navigation registration
            builder.Register<INavigation>(context =>
                App.Current.MainPage.Navigation
            ).SingleInstance();
        }
    }
}
This simply registers both our ViewFactory and Navigator against their interfaces as singletons. Notice I am also registering INavigation using a delegate registration. This returns the App.Current.MainPage.Navigation when resolved by the Lazy<INavigation> in the Navigator.
Now create the following AutofacBootstrapper class.
namespace Silkweb.Mobile.Core.Bootstrapping
{
    public abstract class AutofacBootstrapper
    {
        public void Run()
        {
            var builder = new ContainerBuilder();

            ConfigureContainer(builder);

            var container = builder.Build();
            var viewFactory = container.Resolve<IViewFactory>();

            RegisterViews(viewFactory);

            ConfigureApplication(container);
        }

        protected virtual void ConfigureContainer(ContainerBuilder builder)
        {
            builder.RegisterModule<AutofacModule>();
        }

        protected abstract void RegisterViews(IViewFactory viewFactory);

        protected abstract void ConfigureApplication(IContainer container);
    }
}
This exposes one method called Run and 3 protected virtual methods. In ConfigureContainer we register the AutofacModule above. RegisterViews is abstract and must be implemented in order to register our view models and views with the View Factory. ConfigureApplication is also abstract and is where we should set the main page and anything else related to the application.
Change the application bootstrapper so that it derives from AutofacBootstrapper.
namespace Silkweb.Mobile.MountainForecast
{
    public class Bootstrapper : AutofacBootstrapper
    {
        private readonly App _application;

        public Bootstrapper(App application)
        {
            _application = application;
        }

        protected override void ConfigureContainer(ContainerBuilder builder)
        {
            base.ConfigureContainer(builder);
            builder.RegisterModule<MountainForecastModule>();
        }

        protected override void RegisterViews(IViewFactory viewFactory)
        {
            viewFactory.Register<MountainAreasViewModel, MountainAreasView>();
        }

        protected override void ConfigureApplication(IContainer container)
        {
            // set main page
            var viewFactory = container.Resolve<IViewFactory>();
            var mainPage = viewFactory.Resolve<MountainAreasViewModel>();
            var navigationPage = new NavigationPage(mainPage);

            _application.MainPage = navigationPage;
        }
    }
}
The MountainForecastModule now gets registered in ConfigureContainer, the view models and views get registered in RegisterViews and I create and set the main page in ConfigureContainer. Notice I am using the view factory to resolve the main page. I also pass an instance of App to the bootstrapper to ensure that we set its main page after it has been created.
Now we have our bootstrapper update the MountainForecastApp.cs to create an instance of the bootstrapper class in its constructor.
        public MountainForecastApp()
        {
            InitializeComponent();

            var bootstrapper = new Bootstrapper(this);
            bootstrapper.Run();
        }
Forecast Page
Now that we’ve got this in place we can focus on creating the Forecast page. First I need to extend the MoutainWeatherService with a method to return a forecast for a given area. Create the following ForecastReport model class in the Models folder of the applications shared PCL project.
namespace Silkweb.Mobile.MountainForecast.Models
{
    public class ForecastReport
    {
        public string Forecast { get; set; }
    }
}
Add the following method to IMountainWeatherService which returns a ForecastReport for a given area id.
ForecastReport GetAreaForecast(int id);
And then add the following implementation to MountainWeatherService.
public ForecastReport GetAreaForecast(int id)
{
    switch (id)
    {
        case 100 : return new ForecastReport { Forecast =  "Today will be fine and dry." };
        case 101 : return new ForecastReport { Forecast =  "Today will be wet and windy." };
        case 102 : return new ForecastReport { Forecast =  "Blizzards expected throughout the day." };
        case 103 : return new ForecastReport { Forecast =  "Today will be very cold with occasional snow snowers." };
        case 104 : return new ForecastReport { Forecast =  "High winds and white out conditions expected." };
        default:
            return null;
    }
}
Again I am just returning some dummy data here. We will be talking to a real web service later.
Now add this simple ForecastReportViewModel to the ViewModels folder.
namespace Silkweb.Mobile.MountainForecast.ViewModels
{
    public class ForecastReportViewModel : ViewModelBase
    {
        private string _forecast;

        public string Forecast
        {
            get { return _forecast; }
            set { SetProperty(ref _forecast, value); }
        }
    }
}
Notice here we are calling the SetProperty helper method to raise PropertyChanged when the Forecast changes.
And create a Xaml Content Page called ForecastReportView in the Views Folder.
<?xml version="1.0" encoding="UTF-8"?>
<ContentPage
    xmlns="http://xamarin.com/schemas/2014/forms"
    xmlns:x="http://schemas.microsoft.com/winfx/2009/xaml"
    x:Class="Silkweb.Mobile.MountainForecast.Views.ForecastReportView"
    Title="{Binding Title}">

    <Label Text="{Binding Forecast}" />

</ContentPage>
This simply binds a label to the Forecast property on the view model and also binds the page Title.
Now let’s update the bootstrapper to register these with the view factory.
protected override void RegisterViews(IViewFactory viewFactory)
{
    viewFactory.Register<MountainAreasViewModel, MountainAreasView>();
    viewFactory.Register<ForecastReportViewModel, ForecastReportView>();
}
And then update the MountainForecastModule class to register these new types as single instances. This will ensure that we only use one single instance of the ForecastViewModel and ForecastReportView.
namespace Silkweb.Mobile.MountainForecast
{
    public class MountainForecastModule : Module
    {
        protected override void Load(ContainerBuilder builder)
        {
            // service registration
            builder.RegisterType<MountainWeatherService>()
                .As<IMountainWeatherService>()
                .SingleInstance();

            // view model registration
            builder.RegisterType<MountainAreaViewModel>();

            builder.RegisterType<MountainAreasViewModel>()
                .SingleInstance();

            builder.RegisterType<ForecastReportViewModel>()
                .SingleInstance();

            // view registration
            builder.RegisterType<MountainAreasView>()
                .SingleInstance();

            builder.RegisterType<ForecastReportView>()
                .SingleInstance();
        }
    }
}
Next we need to navigate from each MountainAreaViewModel to the ForecastViewModel. Update the MountainAreaViewModel by adding a Command called ShowForecastCommand and injecting INavigator.
namespace Silkweb.Mobile.MountainForecast.ViewModels
{
    public class MountainAreaViewModel : ViewModelBase
    {
        private readonly IMountainWeatherService _mountainWeatherService;
        private readonly INavigator _navigator;
        private readonly Location _location;

        public MountainAreaViewModel(Location location,
            IMountainWeatherService mountainWeatherService,
            INavigator navigator)
        {
            _location = location;
            _navigator = navigator;
            _mountainWeatherService = mountainWeatherService;
            ShowForecastCommand = new Command(ShowForecast);
        }

        public string Name { get { return _location.Name; } }

        public ICommand ShowForecastCommand { get; set; }

        private void ShowForecast()
        {
            ForecastReport forecastReport = _mountainWeatherService.GetAreaForecast(_location.Id);

            _navigator.PushAsync<ForecastReportViewModel>(viewModel =>
                {
                    viewModel.Title = _location.Name;
                    viewModel.Forecast = forecastReport.Forecast;
                });
        }
    }
}
Note that previously we injected the IMountainWeatherService to demonstrate dependency injection. Now we are actually using it in the ShowForecast method to return the ForecastReport. We then call PushAsync on the navigator giving it ForecastReportViewModel as the type we wish to navigate to and also provide an action to set the state on the view model.
Now update the MountainAreasViewModel to bind to the ShowForecastCommand.
    <ListView ItemsSource="{Binding Areas}">
        <ListView.ItemTemplate>
            <DataTemplate>
                <TextCell Text="{Binding Name}" Command="{Binding ShowForecastCommand}" />
            </DataTemplate>
    </ListView.ItemTemplate>
And now we should be good to go. Build the app and run it up in the iOS simulator.
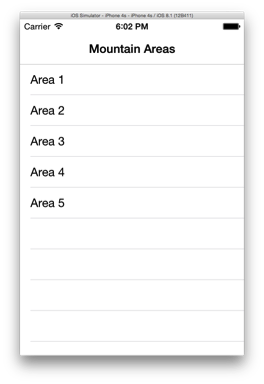
Nothing much changed here. Now click or tap one of the mountain areas.

Hey! Now click or tap the back button and select another mountain area.

Cool, everything works as we expected. We are navigating between these pages just by specifying the view model type. We are also only using one single instance of the Forecast View and View Model and setting its state each time we use the view model.
But there’s one small detail I’ve noticed that’s not quite right. You’d normally expect to see an indicator against each mountain area to show that there is more detail. On the iPhone this is shown as a chevron on the right hand side like this.

But why is it not showing this? The reason is that unfortunately the Xamarin Forms team have not included this in the TextCell yet. What is missing is something called a ‘Disclosure’. It is however very easy to add this feature using a Custom Render.
Extending the TextCell to support a Disclosure
To add a Disclosure option to the TextCell create the following TextCellExtended class in the Core project within the Views Folder.
namespace Silkweb.Mobile.Core.Views
{
    public class TextCellExtended : TextCell
    {
        public static readonly BindableProperty ShowDisclosureProperty =
            BindableProperty.Create<TextCellExtended,bool>(p => p.ShowDisclosure, default(bool));

        public bool ShowDisclosure
        {
            get { return (bool)GetValue(ShowDisclosureProperty); }
            set { SetValue(ShowDisclosureProperty, value); }
        }
    }
}
All this does is extend TextCell and add a boolean BindableProperty called ShowDisclosure.
Now open up the iOS project and add the following DiscloseureTextCellRender class.
using Xamarin.Forms;
using Silkweb.Mobile.MountainForecast.iOS;
using Silkweb.Mobile.Core.Views;

[assembly: ExportRenderer (typeof (TextCellExtended), typeof (DiscolosureTextCellRenderer))]

namespace Silkweb.Mobile.MountainForecast.iOS
{
    public class DiscolosureTextCellRenderer : Xamarin.Forms.Platform.iOS.TextCellRenderer
    {
        public override MonoTouch.UIKit.UITableViewCell GetCell (Cell item, MonoTouch.UIKit.UITableView tv)
        {
            var cell = base.GetCell (item, tv);

            var textCellExtended = item as TextCellExtended;

            if (textCellExtended.ShowDisclosure)
                cell.Accessory = MonoTouch.UIKit.UITableViewCellAccessory.DisclosureIndicator;

            return cell;
        }
    }
}
This is fairly standard approach for creating custom renderers. More details on creating custom renderers can be found on the Xamarin Forms website here.
(Note: You can also find many more extended controls in the Xamarin Forms Labs project which includes a whole host of extended controls. I will be taking a look at this in a later post.)
Now update the MountainAreasView xaml to use our new TextCellExtended.
<?xml version="1.0" encoding="UTF-8"?>
<ContentPage
    xmlns="http://xamarin.com/schemas/2014/forms"
    xmlns:x="http://schemas.microsoft.com/winfx/2009/xaml"
    xmlns:cv="clr-namespace:Silkweb.Mobile.Core.Views;assembly=Silkweb.Mobile.Core"
    x:Class="Silkweb.Mobile.MountainForecast.Views.MountainAreasView"
    Title="{Binding Title}">

    <ListView ItemsSource="{Binding Areas}">
        <ListView.ItemTemplate>
            <DataTemplate>
                <cv:TextCellExtended Text="{Binding Name}"
                                     ShowDisclosure="True"
                                     Command="{Binding ShowForecastCommand}" />
            </DataTemplate>
        </ListView.ItemTemplate>
    </ListView>
</ContentPage>
Now build and run the app again.

Yey! And it works. That’s much better.
The great thing about all this is that I now have a View Model first navigation framework in place that I can re-use for all my Xamarin Forms apps.
I hope you found this post useful.
